


 Spanish
 Russian
 Arabic


Products Description
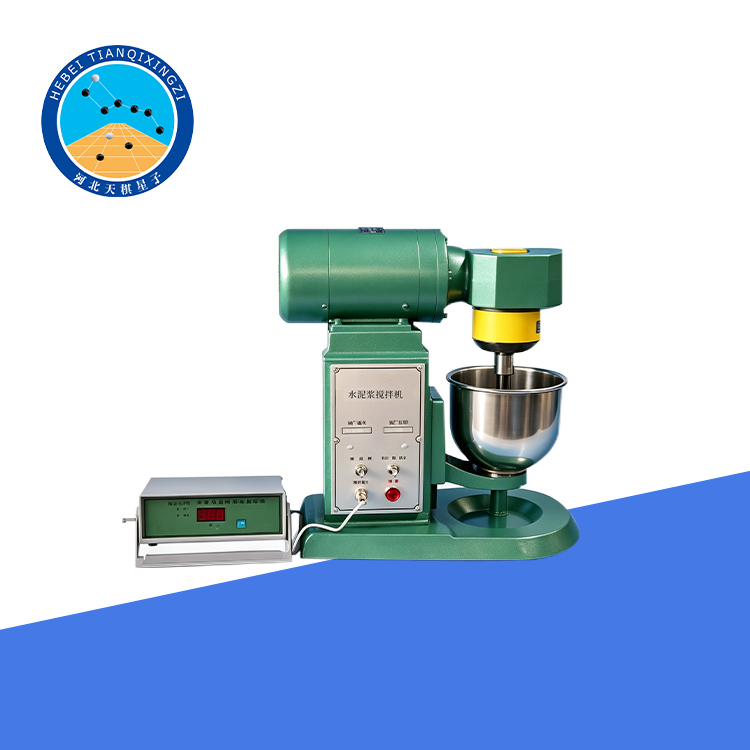
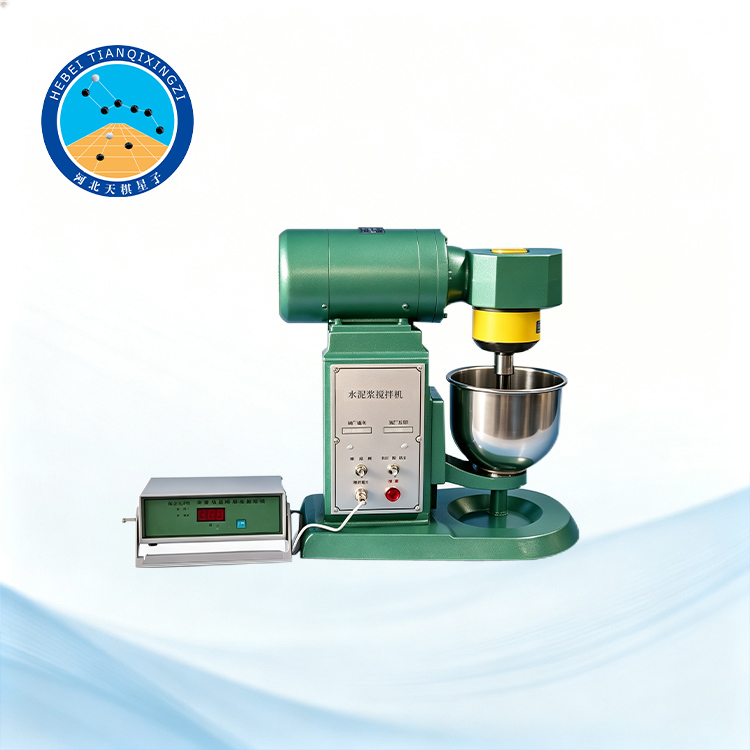
The Cement Paste Mixer is designed to prepare uniform cement paste for laboratory testing of standard consistency, setting time, and soundness. With reliable mixing performance and easy operation, it is suitable for cement plants, construction laboratories, universities, research institutions, and quality control facilities.
Laboratory Cement Paste Mixer
Model: TDJ-160
I. Operating Conditions
1. Ambient Temperature: 0~40℃
2. Humidity: ≤90%RH
3. Operating Voltage: 380V±10%, 50Hz
4. Safety Performance: Complies with National Standard GB/T5226.1-2019
II. Functions and Components
1. Instrument Function
The Laboratory Cement Paste Mixer is designed to mix cement and water in accordance with specified standards to produce a uniform cement paste for determining standard consistency, setting time, and soundness of cement.
The product complies with the relevant Chinese standards JC/T 729-2005 and GB/T 1346-2011, with reference to EN 196-3, EN 196-1, and ASTM C187. It is an essential piece of laboratory equipment for cement manufacturers, construction companies, universities, colleges, and research institutions.
2. Main Components
Main Unit: 1 pc
Controller: 1 pc
Stainless Steel Mixing Bowl: 1 pc
Clearance Measuring Gauge: 1 pc
III. Technical Specifications
1. Revolution: Low speed: 62±5 rpm; High speed: 125±10 rpm
2. Rotation: Low speed: 140±5 rpm; High speed: 285±10 rpm
3. Mixing Vessel: Wall thickness ≥3mm, depth 139mm±2mm, inner diameter 160mm±1mm
4. Automatic Control Program: Low speed: 120 s ± 3 s; stop: 15 s ± 1 s; high speed: 120 s ± 3 s
5. Mixing Bowl Capacity: ≥ 2.5 L
6. Clearance Between Mixing Blade and Bowl: 2 mm ± 1 mm
7. Mixing Blade: Stainless steel; outer diameter of the blade shaft: 20 mm ± 1 mm; thread connection between the blade and drive shaft: M16 × 1; other requirements comply with JC/T 729-2005
8. Motor Power: ≥ 370 W
IV. Working Principle
The shaft of the dual-speed motor is connected to the worm shaft inside the gearbox through a coupling flange. The worm gear reduction drives the worm wheel shaft, which rotates the planetary positioning sleeve synchronously. The blade shaft, mounted eccentrically on the planetary positioning sleeve, drives the mixing blade in a planetary orbital motion.
The planetary gear fixed to the upper end of the blade shaft rotates around the fixed internal ring gear, causing the blade to rotate on its own axis while orbiting the mixing bowl. The dual-speed motor is controlled by a timer to automatically complete the specified low-speed → pause → high-speed mixing cycle. The mixing bowl and slide plate are secured by a rotary locking mechanism for quick and stable installation.
V. Commissioning and Installation
1. Lifting: This machine does not have a lifting device; it can be moved manually.
2. Installation: This machine does not require a special foundation or anchor bolts. Simply place the equipment on a flat cement platform.
3. Power Supply and Safety Grounding: This machine uses a three-phase 380V power supply. Do not connect the neutral wire incorrectly during wiring.
The electrical insulation meets standards at the factory. To ensure electrical safety, please reliably ground the safety grounding point on the machine body using a multi-strand plastic copper core wire with a cross-sectional area of not less than 1mm².
VI. Operation and Use
After connecting the power supply, the mixer enters the automatic mixing mode. Press the Program Control button to start the automatic cycle, which consists of 120 seconds of low-speed mixing, a 15-second pause (including a 5-second alarm), and 120 seconds of high-speed mixing. The mixer stops automatically after completing the cycle.
To start another automatic mixing cycle, simply press the Program Control button again.
For manual high- and low-speed operation, first press the Program/Manual button. The display will turn off, indicating that the mixer has entered manual mode. Then select the required high- or low-speed button and control the mixing time manually.
Move the handle to raise or lower the slide plate and mixing bowl along the guide rail of the column. After raising the mixing bowl to the operating position, tighten the positioning screw before starting the mixing operation. To remove the mixing bowl, follow the procedure in reverse.
VII. Adjustment and Maintenance
1. Adjustment
Before shipment, the working clearance between the mixing blade and the mixing bowl is factory-adjusted to 2 ± 1 mm. If adjustment is required after trial operation or maintenance, proceed as follows:
Measure the working clearance between the mixing blade and mixing bowl using the clearance gauge provided with the instrument. If the clearance exceeds the specified 2 ± 1 mm, loosen the adjustment nut and rotate the blade until the correct clearance is achieved, then retighten the adjustment nut.
Alternatively, loosen the screws connecting the motor to the column and the gearbox flange to the motor. Adjust the position until the specified clearance is achieved, then retighten all screws securely.
2. Maintenance
1. Keep the work area clean. After each use, thoroughly remove any residual cement paste from the inside and outside of the mixing blade and mixing bowl. Clean off any spilled or splashed paste and dirt from the machine. Wipe the equipment dry and cover it to prevent dust from entering.
2. The machine is equipped with a new-type gearbox that has been filled with lubricating oil before delivery, so no additional oil is required under normal conditions. If the equipment is used frequently or has been in operation for more than one year, the gearbox lubricant should be properly replenished or replaced.
3. If a metallic impact noise occurs during operation, first check whether the clearance between the mixing blade and mixing bowl is correct.
4. When replacing the mixing bowl or mixing blade, adjust the clearance according to the adjustment procedure described above.
5. Handle the mixing bowl carefully during use. Avoid dropping or striking it to prevent deformation.
6. Regularly check the electrical insulation of the equipment. Under cold conditions at 20 ± 5°C and 50%–70% relative humidity, the insulation resistance should be ≥ 5 MΩ.
