


 Spanish
 Russian
 Arabic


Products Description
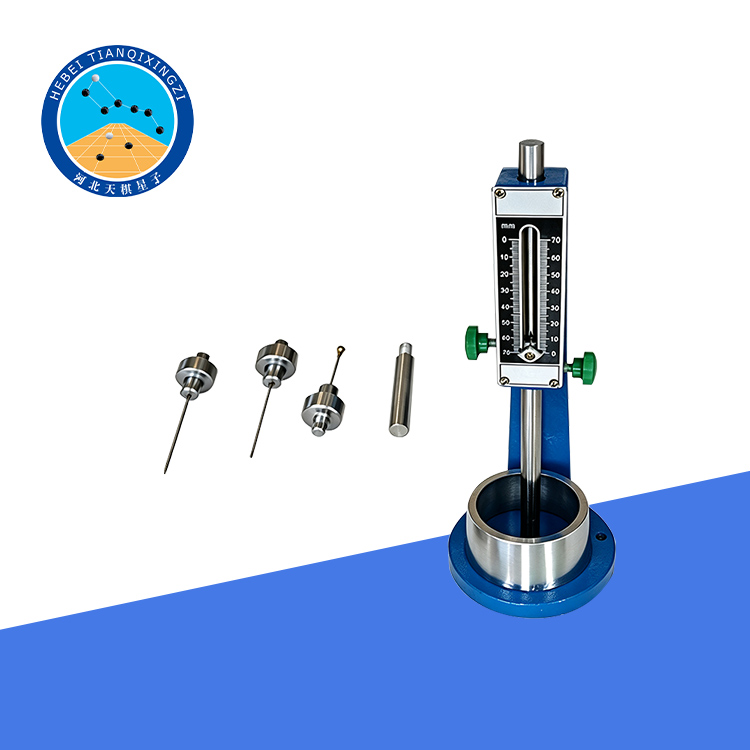
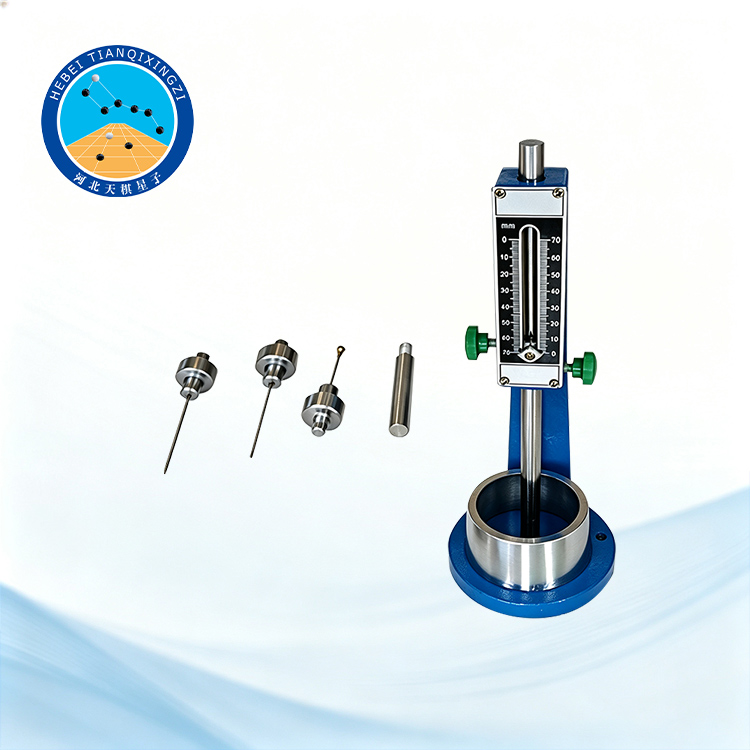
The Laboratory Vicat Apparatus for Cement is designed to determine the standard consistency and setting time of cement paste. It is suitable for testing various types of cement and is widely used in cement plants, construction laboratories, universities, and research institutions. The apparatus provides simple operation and reliable testing performance for routine cement quality control.
Laboratory Vicat Apparatus for Cement
Model: TD505-WK1
I. Product Introduction
The Laboratory Vicat Apparatus for Cement is designed in accordance with GB/T 1346-2001, Methods for Determining Water Requirement for Standard Consistency, Setting Time, and Soundness of Cement Paste. It is suitable for testing Portland cement, ordinary Portland cement, pozzolanic cement, fly ash cement, and other types of cement.
Reference Standards: ASTM C187; ISO 9597; GB/T 1346
II. Technical Specifications
1. Total Weight of Sliding Parts: 300 g
2. Maximum Travel of Sliding Parts: 70 mm
3. Net Weight: ≈3.8 kg
4. Standard Consistency Plunger: 1 pc; effective length: 50 ± 1 mm; diameter: 10 ± 0.05 mm
5. Final Setting Needle: 1 pc; effective length: 30 ± 1 mm; diameter: 1.13 ± 0.05 mm
6. Initial Setting Needles: 2 pcs; effective length: 50 ± 1 mm; diameter: 1.13 ± 0.05 mm
III. Structure and Performance
1. The Vicat apparatus mainly consists of a cast-iron base, support frame, sliding rod, graduated scale, conical mold, standard consistency plunger, setting needles, and other components.
2. The apparatus is equipped with a dual-sided graduated scale. The measurement is taken using the pointer fixed to the sliding rod as the rod moves vertically. The left side of the scale indicates the penetration depth in mm, with a range of 0–70 mm and a minimum graduation of 1 mm. The right side indicates the water requirement for standard consistency.
3. The standard consistency plunger is used to determine the consistency of cement paste, while the setting needles are used to determine the setting time. The plunger and needles can be removed and replaced according to the testing requirements.
IV. Operation and Maintenance
1. Before use, apply a small amount of lubricating oil to the sliding parts and check that they can move freely up and down.
2. of Standard Consistency: Immediately after mixing, place the prepared cement paste into the test mold positioned on the glass base plate. Compact the paste with a knife and gently vibrate the mold several times. Remove the excess paste and smooth the surface.
Quickly transfer the mold and base plate to the Vicat apparatus and center them under the standard consistency plunger. Lower the plunger until it contacts the surface of the cement paste. Tighten the locking screw and then release it suddenly, allowing the plunger to penetrate vertically and freely into the cement paste.
Record the distance between the plunger tip and the base plate when the plunger stops penetrating or 30 seconds after release. Raise the plunger and clean it immediately.
The entire operation should be completed within 1.5 minutes after mixing. The cement paste is considered to have standard consistency when the plunger penetrates to a position 6 ± 1 mm above the base plate. The amount of mixing water used is defined as the water requirement for standard consistency (P), expressed as a percentage of the mass of cement.
3. Determination of Initial Setting Time
The specimen shall be cured in a moisture curing chamber until 30 minutes after water is added, when the first measurement is performed.
Remove the test mold from the moisture curing chamber and place it under the setting needle. Lower the needle until it contacts the surface of the cement paste. Tighten the locking screw for 1–2 seconds, then release it suddenly, allowing the needle to penetrate vertically and freely into the cement paste.
Observe the pointer reading when the needle stops penetrating or 30 seconds after release. When the needle penetrates to a position 4 ± 1 mm above the base plate, the cement is considered to have reached the initial setting state.
The time from the moment water is completely added to the cement until the cement reaches the initial setting state is defined as the initial setting time, expressed in minutes (min).
4. Determination of Final Setting Time
To accurately observe the penetration of the setting needle, an annular attachment is fitted to the final setting needle.
Immediately after determining the initial setting time, carefully remove the test mold and cement paste from the glass plate by horizontal movement. Turn the mold 180°, with the larger diameter facing upward and the smaller diameter facing downward, and place it back on the glass plate. Then return the specimen to the moisture curing chamber for continued curing.
As the final setting time approaches, perform the measurement every 15 minutes. When the needle penetrates the specimen to a depth of 0.5 mm, and the annular attachment no longer leaves a visible mark on the specimen surface, the cement is considered to have reached the final setting state.
The time from the moment water is completely added to the cement until the cement reaches the final setting state is defined as the final setting time, expressed in minutes (min).
5. Precautions During Testing
During the initial measurement, gently support the metal rod and allow it to descend slowly to prevent the setting needle from being bent by impact. However, the final measurement result shall be based on free falling of the needle.
Throughout the test, the penetration point of the needle shall be at least 10 mm away from the inner wall of the test mold.
As the initial setting time approaches, perform measurements every 5 minutes. As the final setting time approaches, perform measurements every 15 minutes.
When the initial or final setting point is reached, immediately repeat the measurement. The cement shall be considered to have reached the initial or final setting state only when the same result is obtained in two consecutive measurements.
For each measurement, ensure that the needle does not penetrate the same point as in the previous measurement.
After each measurement, clean the needle thoroughly and return the test mold to the moisture curing chamber.
Throughout the testing process, avoid exposing the test mold to vibration or mechanical disturbance.
